Los que llevamos unos años en esto, recordamos lo maravilloso que era insertar un mapa de Google Maps en una web. Era copiar y pegar. Pero un buen día entró en nuestras días un concepto que lo cambió todo: la API.
En este artículo os voy a contar cómo dar de alta la API de Google Maps, ya sea para insertar un mapa en vuestra web, o para trabajar con herramientas como Advanced Custom Fields, etc.
Cómo dar de alta la API de Google Maps
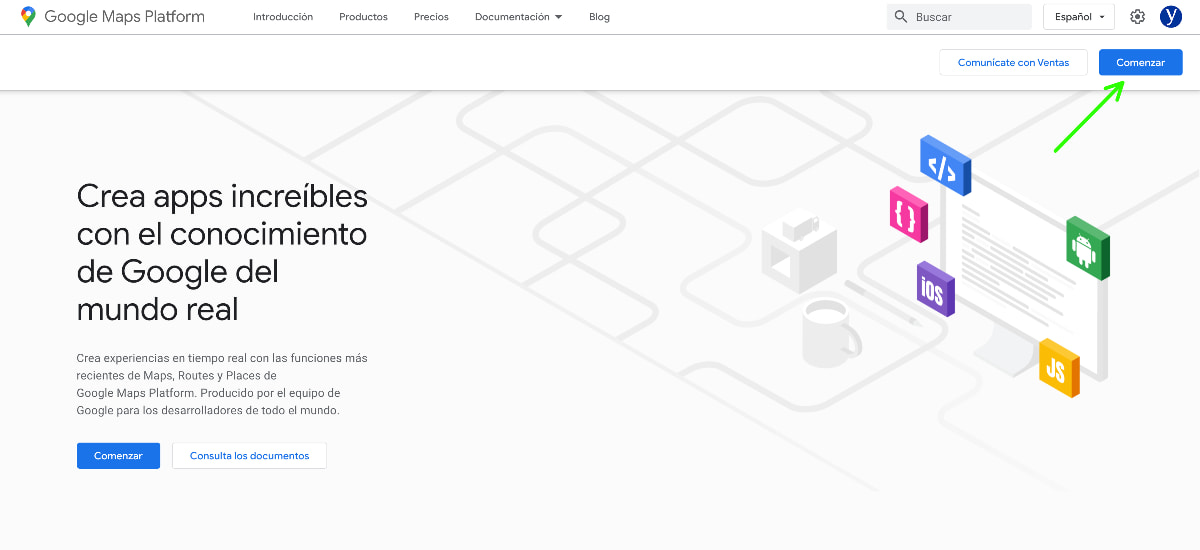
Para dar de alta la API de Google Maps, hay que acceder a la plataforma para desarrolladores de Google Maps. En concreto, podemos acceder directamente a la parte de Google Maps.
Por supuesto, para este tutorial, asumo que tienes una cuenta de google, que será necesaria para autentificarse en esta plataforma, perteneciente a Google Cloud.
Puesto que Google Cloud es un servicio de pago, esto implica que tienes que darte de alta en la cuenta como cliente, aunque tengas una cuenta de Google.
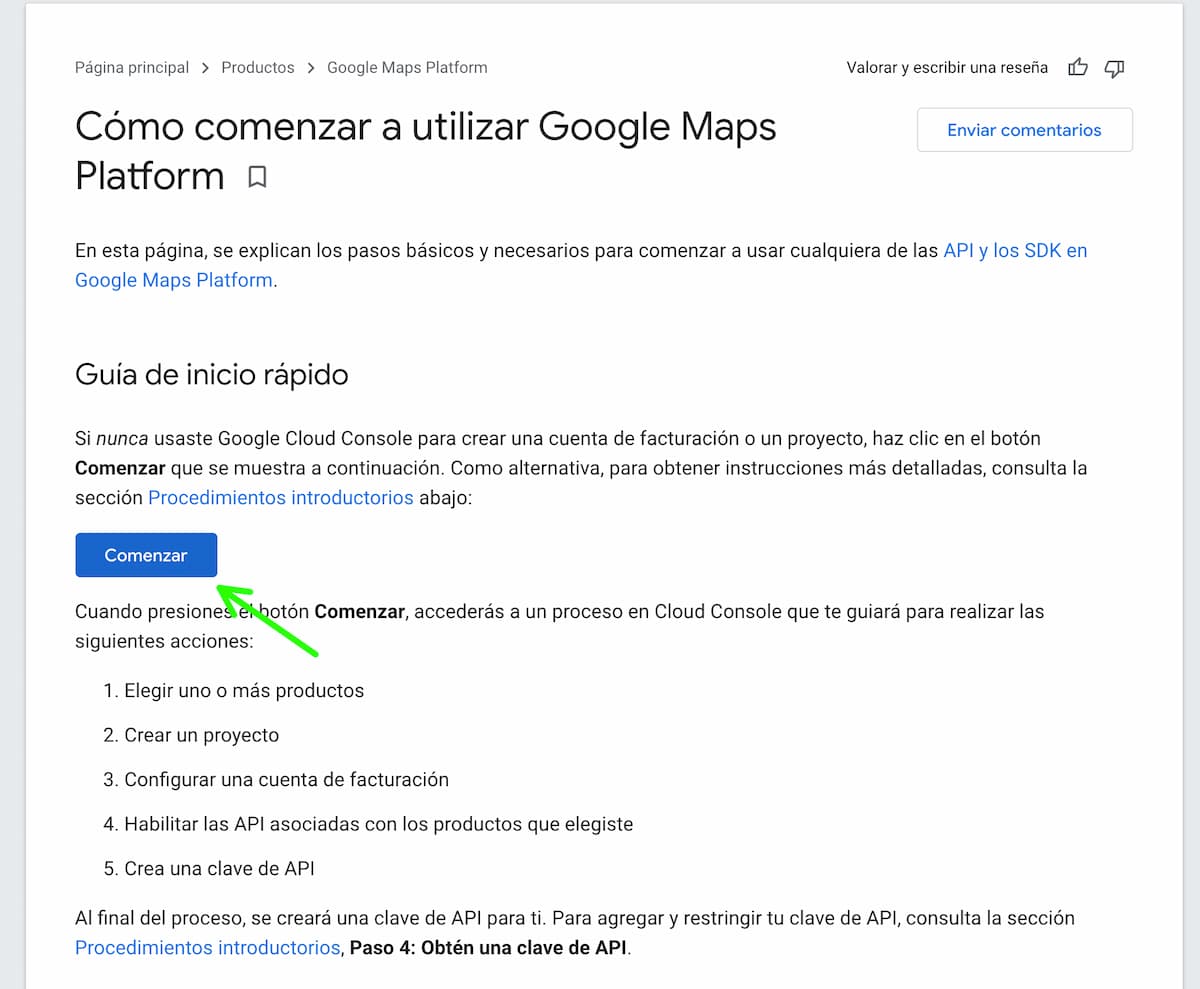
Por ello, cuando le des clic a comenzar, te va a obligar a dar un paso un poco redundante ya que, primero te llevará a una pantalla con unas instrucciones, dentro de las cuales verás un botón similar de comenzar.
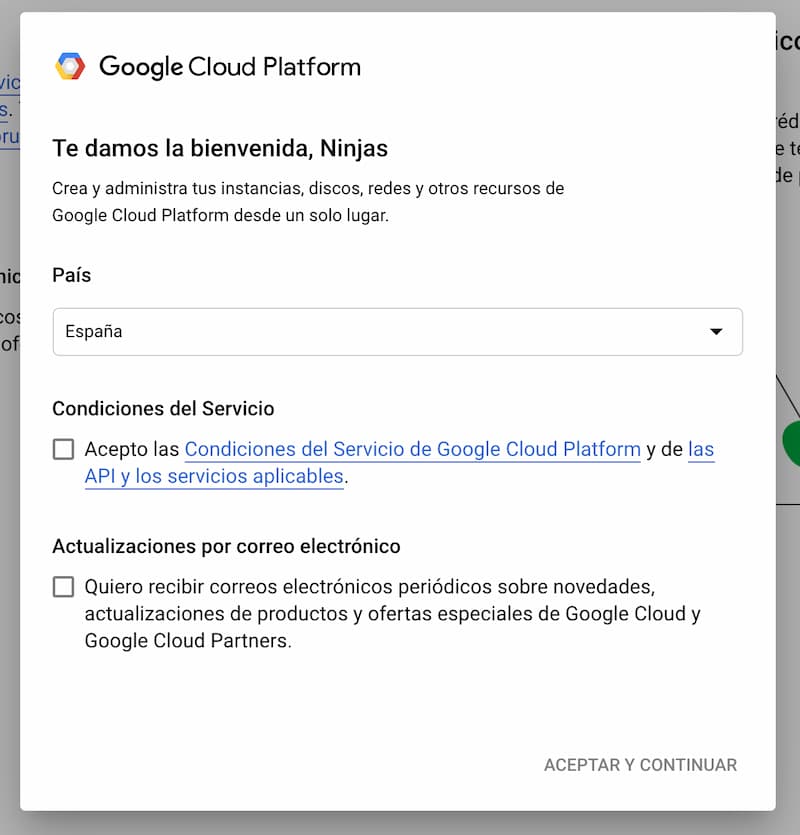
Si nunca te has dado de alta en Google Cloud Platform, te saldrá una ventana modal de bienvenida, en la cual te solicitarán aprobar las condiciones.
Por supuesto, debes elegir el país desde el que aceptas el servicio, en mi caso España, y aceptar las condiciones del servicio de Google Cloud Platform y de las API y los servicios aplicables.
Por otro lado, si quieres recibir noticias periódicas en tu correo sobre este servicio, puedes hacer clic en la siguiente casilla, pero eso ya depende de que quieras o no.
Por último, tendrás que hacer clic en Aceptar y continuar.
¿Cuánto cuesta Google Maps Platfom?
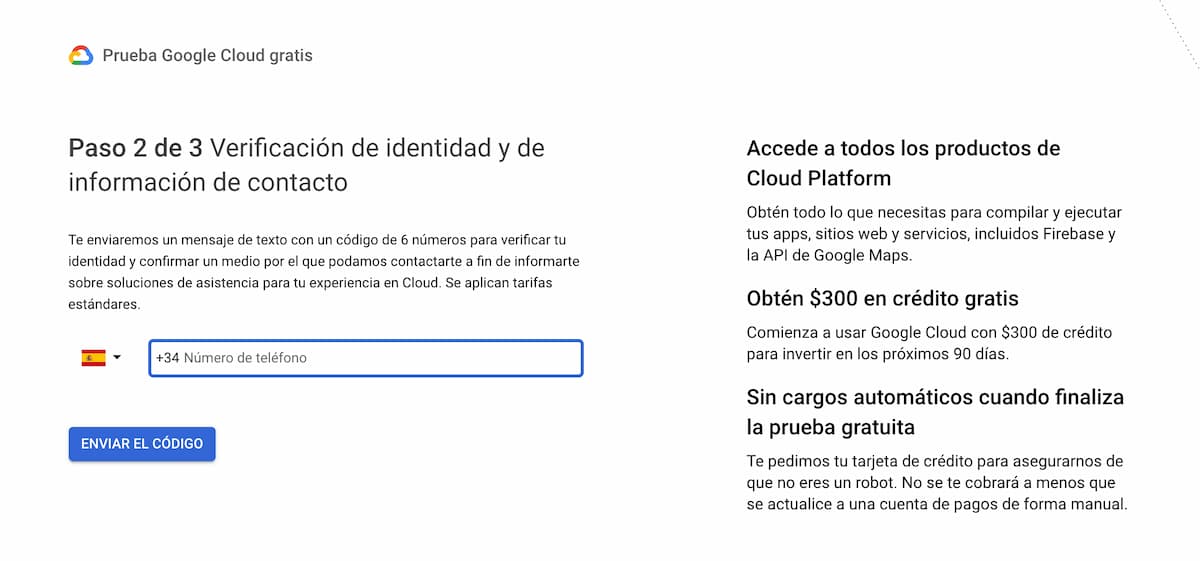
Una vez confirmado este paso, te saldrá una ventana informativa donde te informarán de que vas a recibir $300 de crédito gratuito para invertir en 90 días. Esto te va a permitir practicar con la plataforma durante un tiempo.
A mí personalmente me inquieta un poco que te cobren en función del tráfico, etc, sobre todo porque Google es muy dado a cambiar precios. No obstante, no hay que preocuparse demasiado si el uso que vas a darle es el habitual, ya que embeber mapas tiene precio cero.
No obstante, a continuación te dejo un enlace en el que puedes consultar los precios de este servicio, y verás que no son muy descabellados salvo que seas el dueño de la web de la Guía Campsa y tengas toda tu infraestructura basada en mapas de Google Maps.
Precios de la api de Google Maps
En cualquier caso, en este paso 2 de 3, lo único que tienes que hacer es añadir tu número de teléfono para qeu te envíen un código de verificación de cuenta, que es que nos estamos adelantando demasiado.
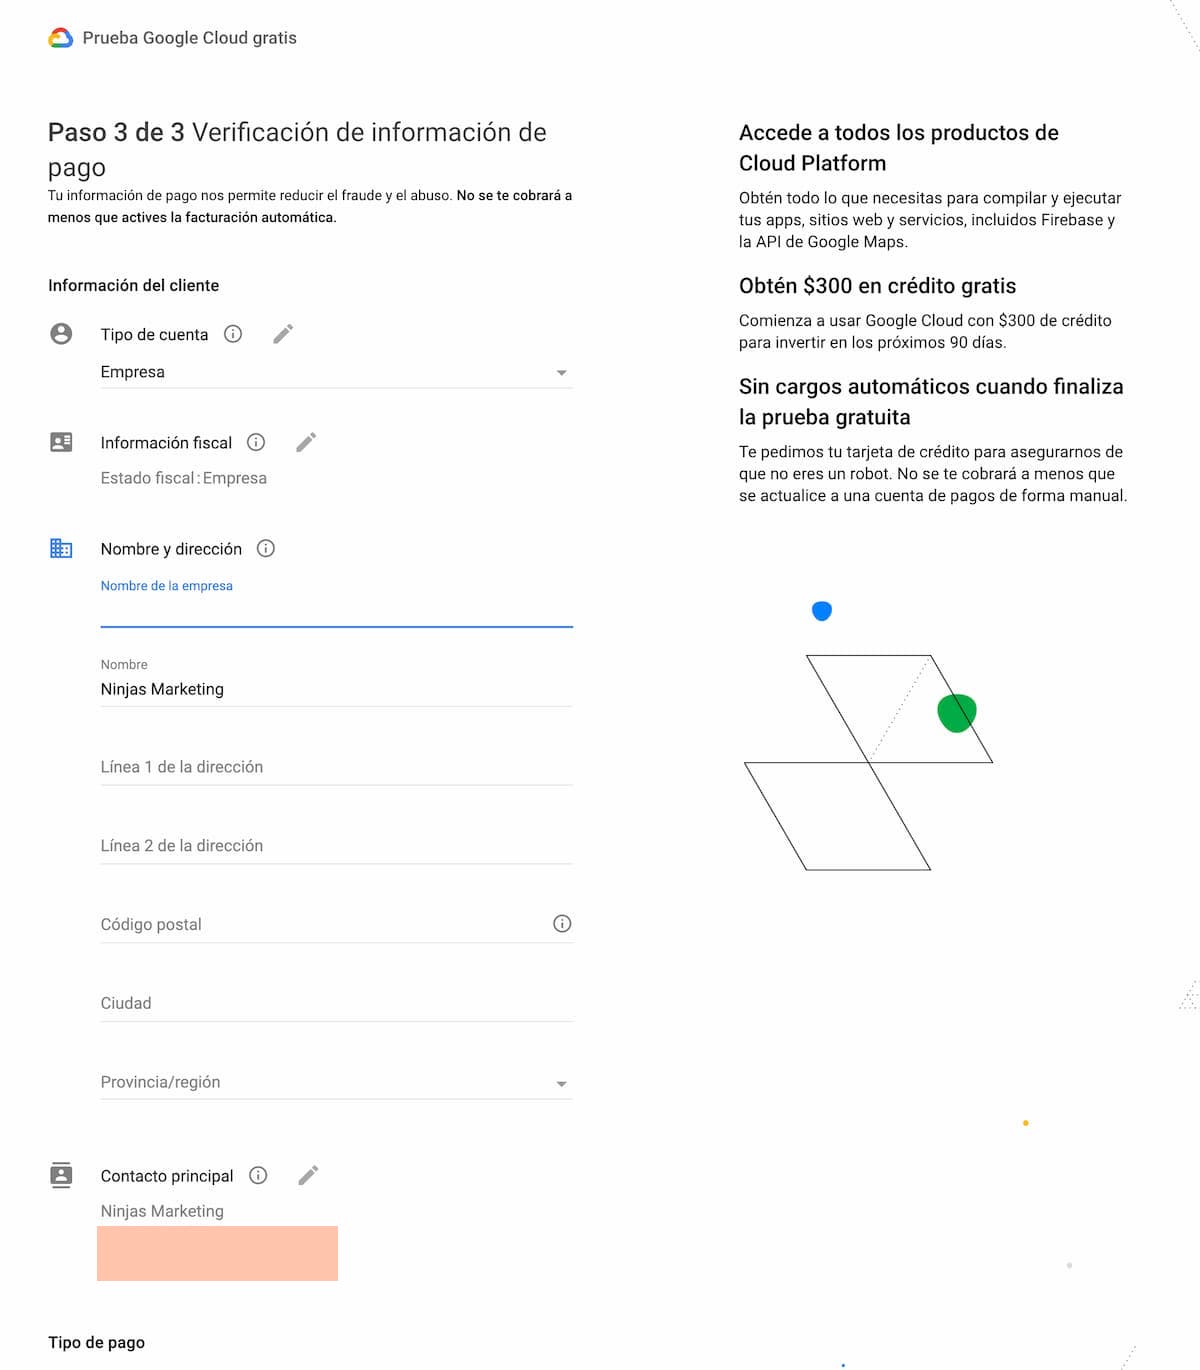
Una vez añadido el número de teléfono y recibido el código, en el paso 3 de 3 tendrás que verificar la información de pago. Aquí es donde toca retratarse (bueno, al menos en potencia).
Por tanto, aquí tendrás que añadir tus datos fiscales e introducir el tipo de pago. Un truco: yo lo que hago es poner como tarjeta de pago una tarjeta prepago de estas que te proporcionan los bancos para compras en internet.
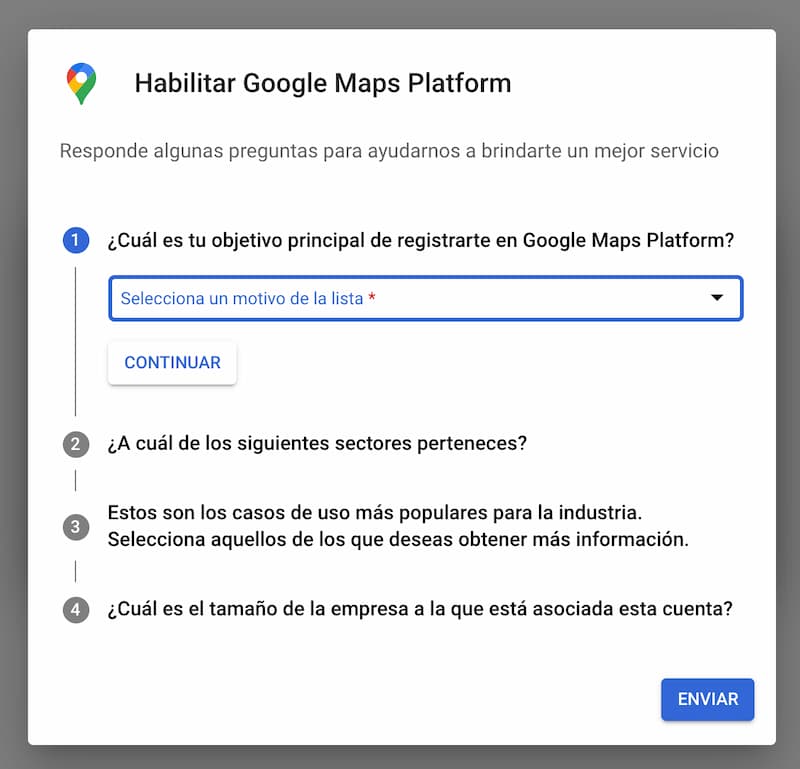
Después de añadir los datos de pago y fiscales, vas a tener que rellenenar una pequeña encuesta sobre cuál es el motivo e registrarte en Google Maps Platform, a qué sector perteneces, que prometes portarte bien, que te portaste bien en la escuela…
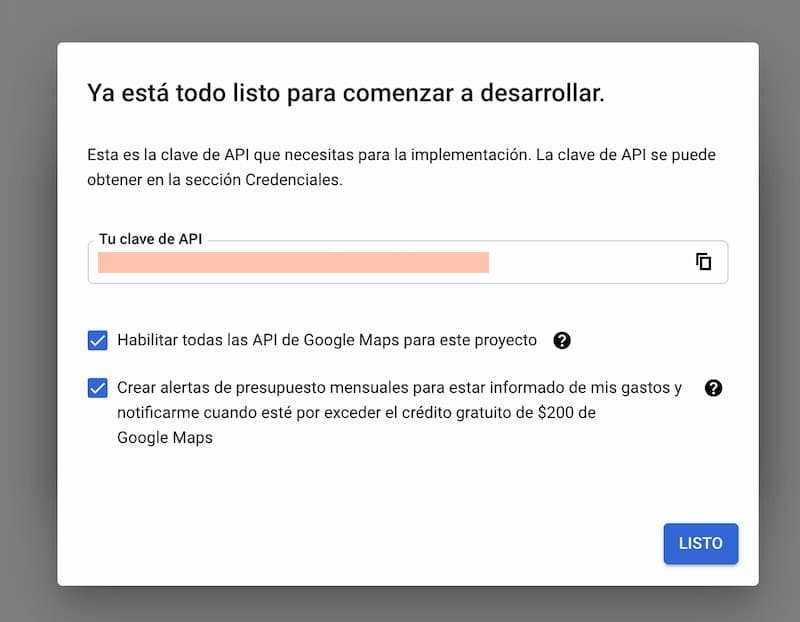
Y por fin llegará el tan ansiado momento, Google te proporcionará tu clave de API.
Como verás, se trata de una cadena alfanumérica de una longitud respetable, la cual debes preservar y no compartir por ahí, porque se trata de la llave a que cualquiera pueda usarla a costa tuya, invitando la casa.
Cuando te la ofrece, puedes habilitar todas las API de Google Maps para el proyecto para el que estás dando de alta la API. Esto no es seguro, en este caso, como se trata de un ejercicio, yo lo he hecho, pero en un proyecto convencional, deberías dar de alta únicamente aquellas API que vayas a utilizar.
Por otro lado, también te permite habilitar alertas para que te informe de tu presupuesto mensual y de si te estás pasando de tu crédito gratuito. Esto sí que conviene habilitarlo sí o sí.
Cómo proteger la clave de API de Google Maps
Un poco como si de una doble autentificación se tratase, y como los de Google son muy listos, han habilitado un sistema de protección de tu clave utilizando varios métodos que te muestro y paso a enumerarte.

Hay 5 métodos de protección de una API de google:
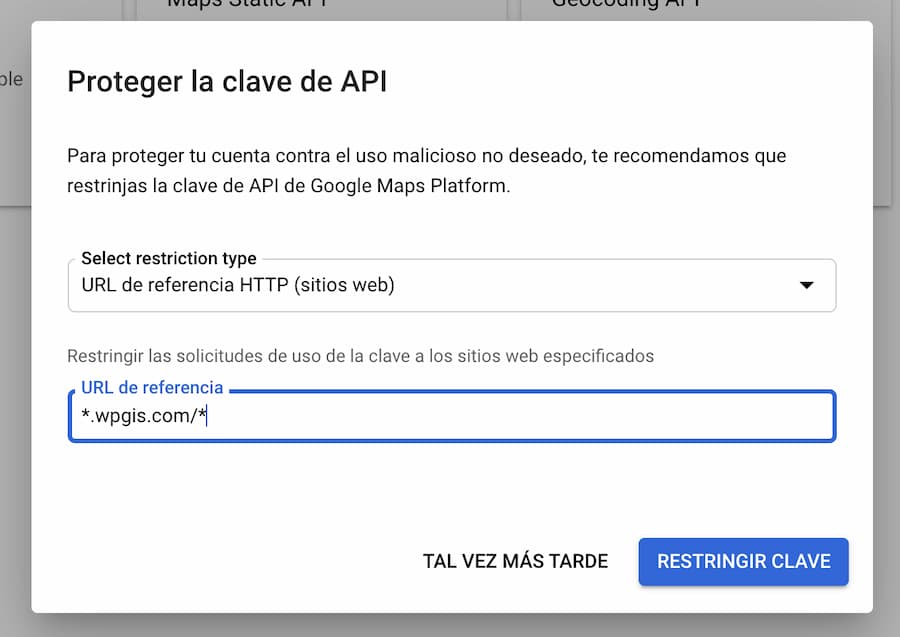
- URL de referencia HTTP (sitios web): es la más habitual, y básicamente consiste en que esa API se va a ejecutar únicamente bajo la URL o el dominio de tu web. Permite comodines, por lo que, como puedes ver en el ejemplo, puedes añadirle un comodín para los subdominios y otro tras la barra después del dominio para cualquier URL dentro del mismo. Si quieres, puedes ser más restrictivo.
- Direcciones IP (servidores web, trabajos cron, etc): Con éste modo puedes permitir que la API se llame únicamente desde un servidor concreto por medio de la IP, como por ejemplo desde tu servidor VPS. Esto permitiría que todas las webs dentro de ese hosting puedan hacer llamadas a la API.
- Apps para Android: Como puedes imaginar, permitirá hacer peticiones desde una app de Android concreta.
- Apps para iOS: Igual que la anterior, pero para hacer peticiones desde una app de iOS.
- Restricción de API: Con esta opción podrás seleccionar las API a las que puede permitir esa clave de API.
En mi caso, para el ejemplo que voy a hacer, he utilizado la restricción por URL de referencia, y lo he restringido al dominio wpgis.com, que es mi web de pruebas.
Cómo cambiar el nombre de proyecto en Google Cloud Platform
Como podrás ver arriba, a la izquierda, verás que aparece My First Project, que no sé tu, pero a mí me parece una mierda de nombre para un proyecto.

En caso de que tuvieras varios proyectos, si despliegas ese selector, podrías verlos todos y cambiar entre uno y otro.
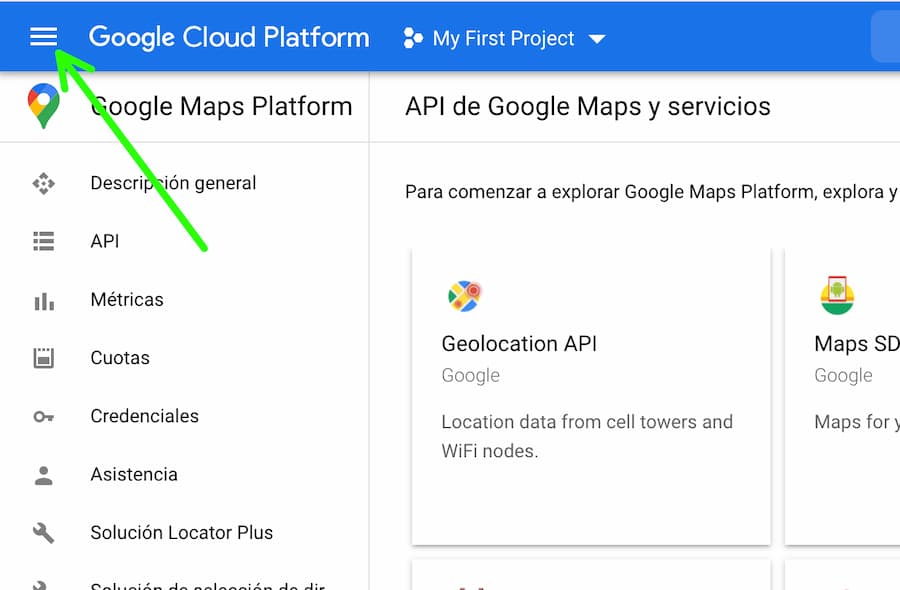
Pero ahora lo que vamos a hacer es cambiar el nombre de ese proyecto, por lo que asegúrate de que estás en ese proyecto en concreto (My First Project). Para ello, tendrás que ir al menú de sandwich (las tres rayas horizontales) que tienes en la parte superior izquierda y desplegar dicho menú.
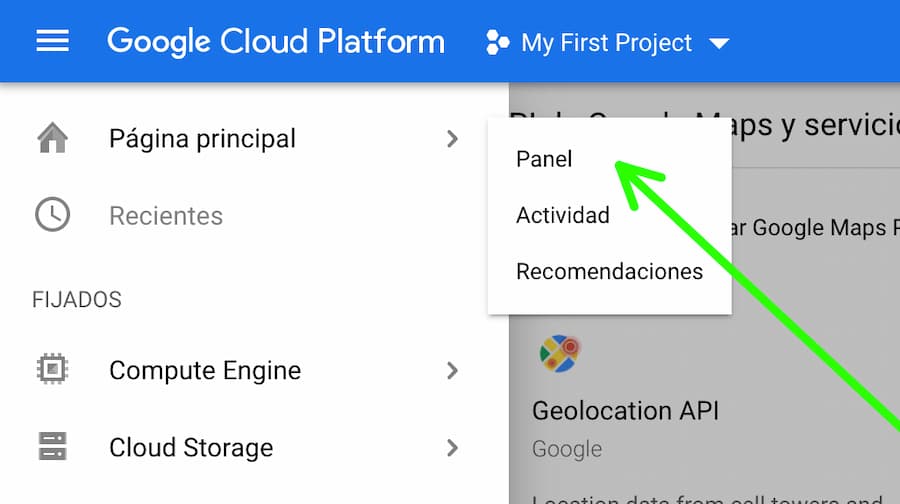
Se desplegará un menú lateral, en el cual debes ir a Página principal –> Panel, donde podrás editar la información del proyecto, en una de las tarjetas que vemos al principio de la pantalla.
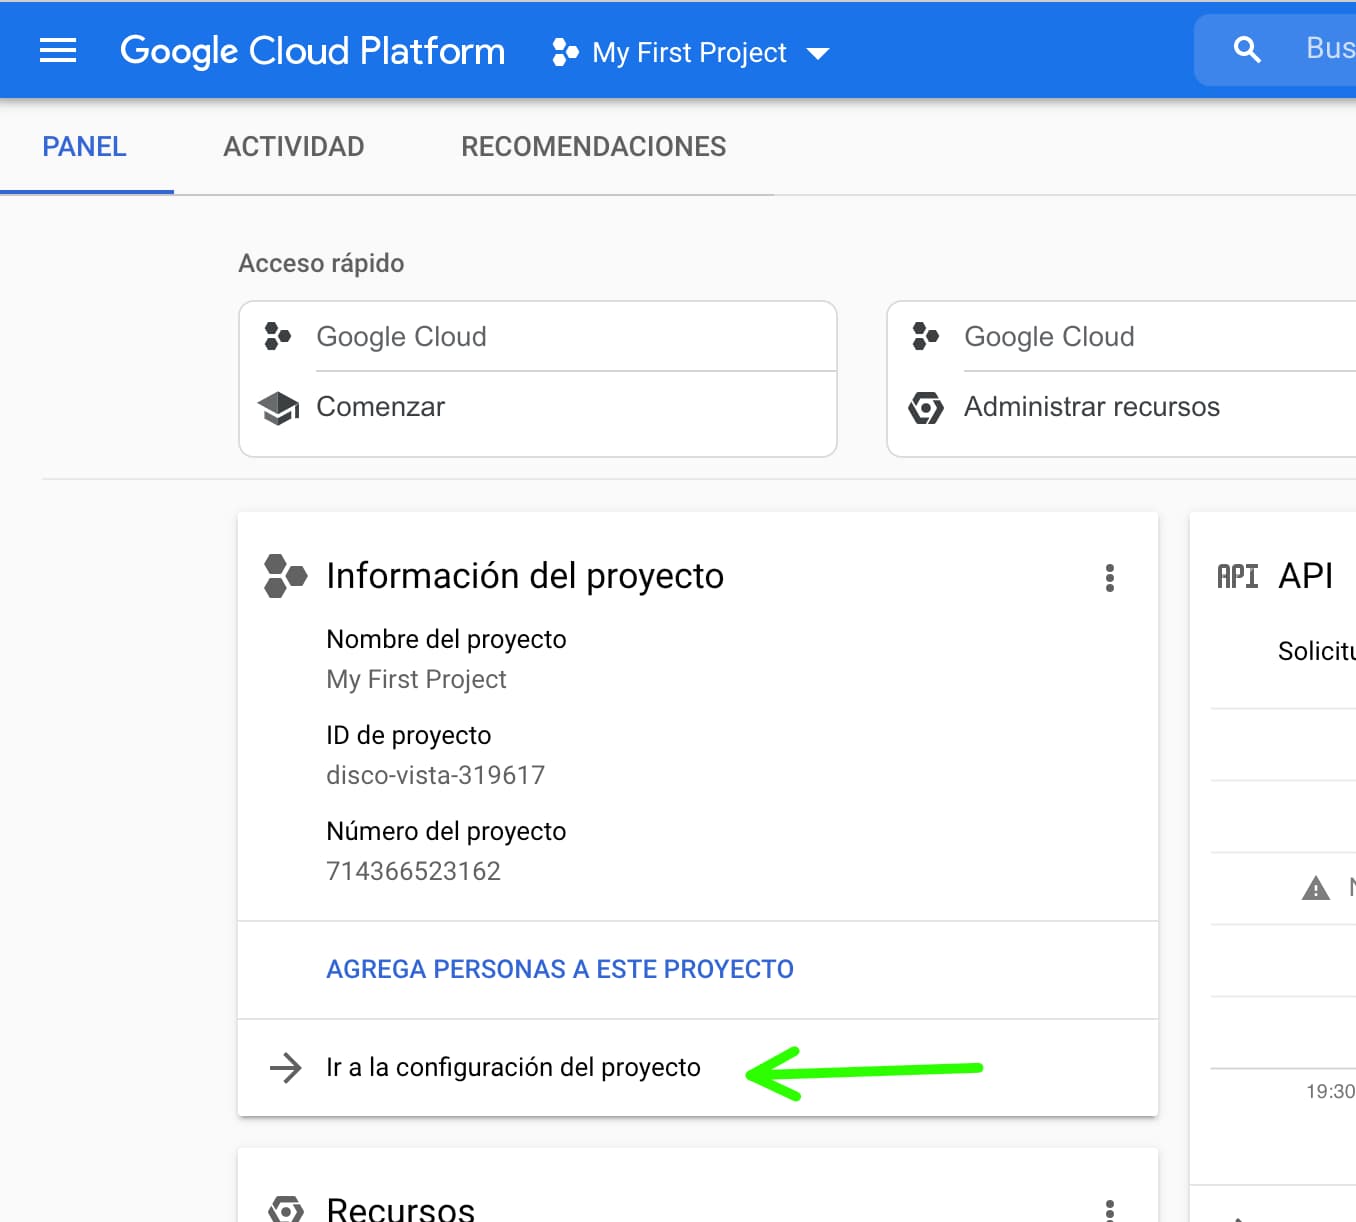
Esa tarjeta que te comento tiene el siguiente aspecto, con un enlace en la parte inferior (Ir a la configuración del proyecto). Haz clic en este enlace.
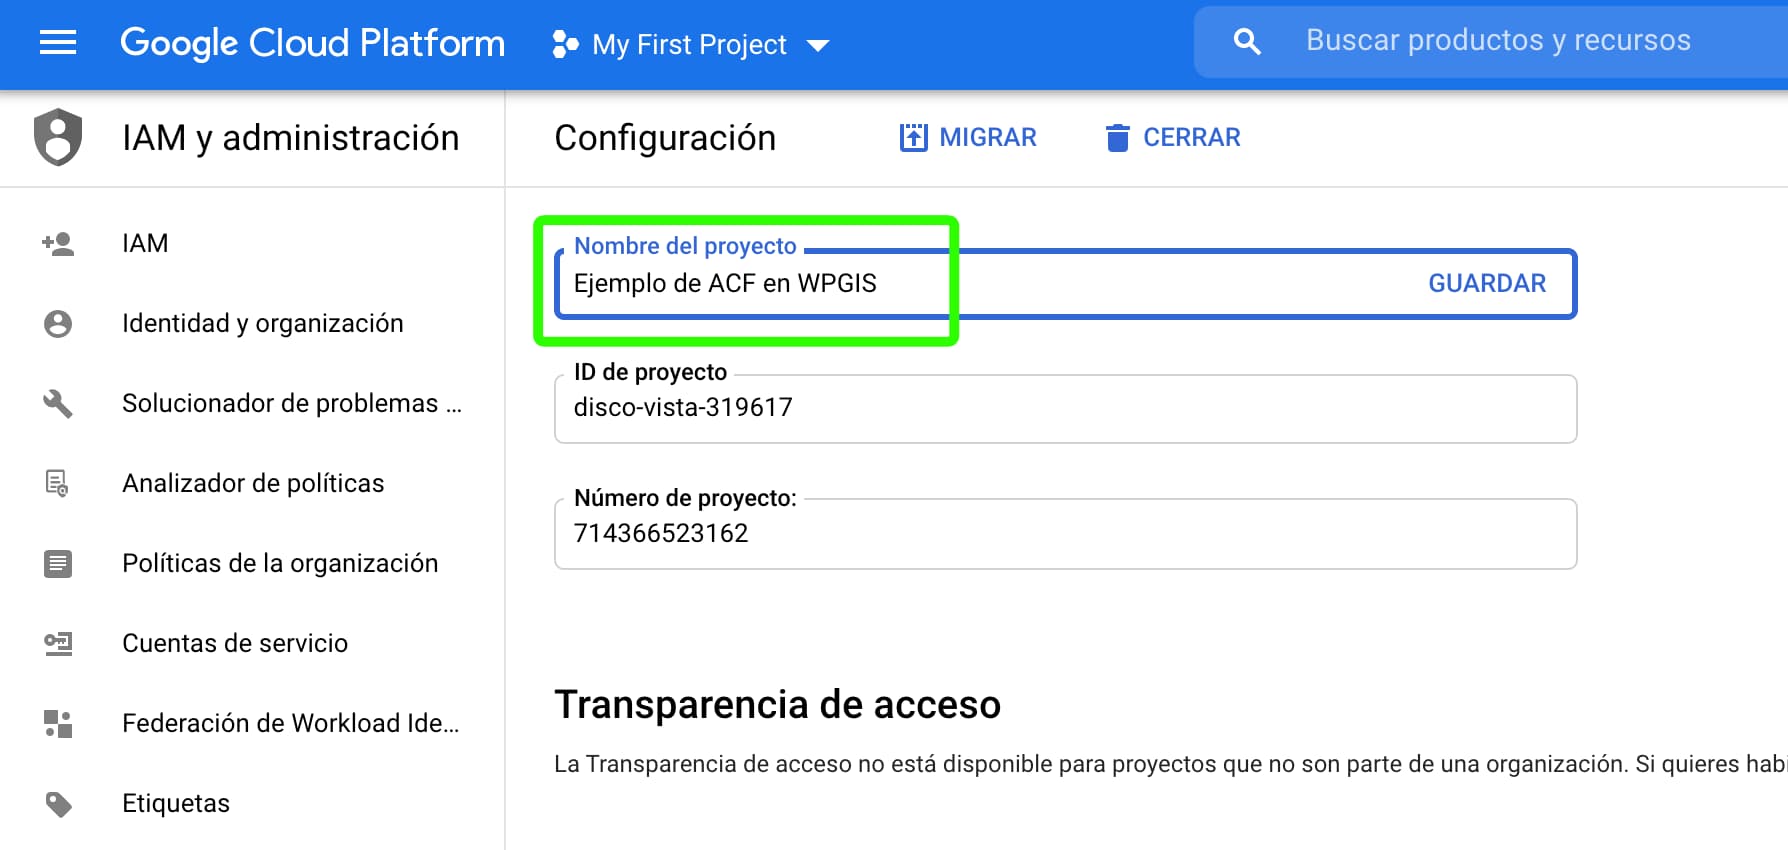
Aquí en los datos del proyecto puedes cambiar el nombre al que tú quieras. Después haz clic en guardar, que es el enlace que tienes justo al lado.
Cómo acceder a las diferentes API
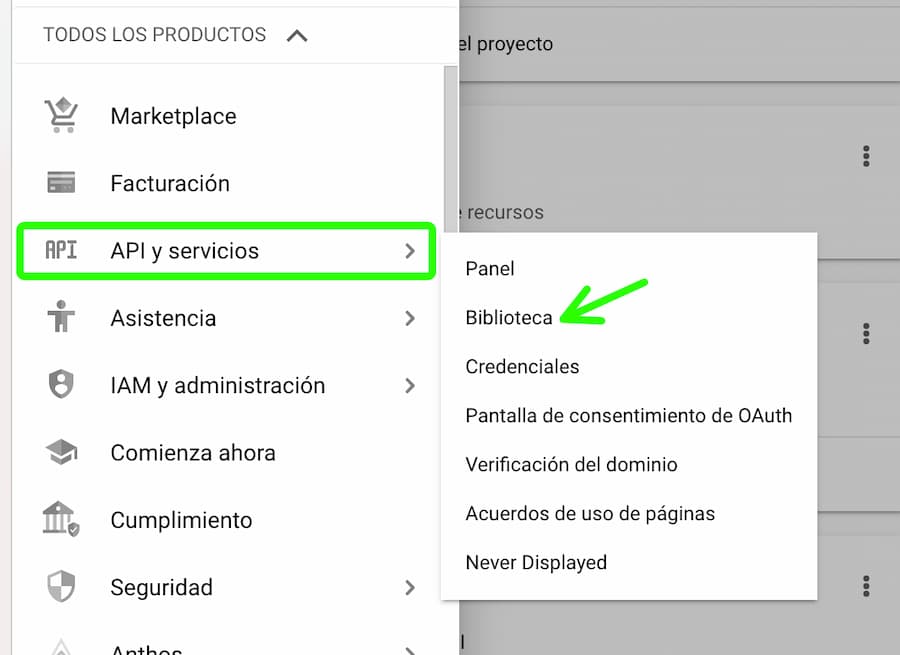
En el menú lateral que sale del menú de sandwich, puedes volver al panel de antes a través de API y servicios –> Panel, pero si quieres acceder y gestionar las diferentes API, haz clic en Biblioteca.
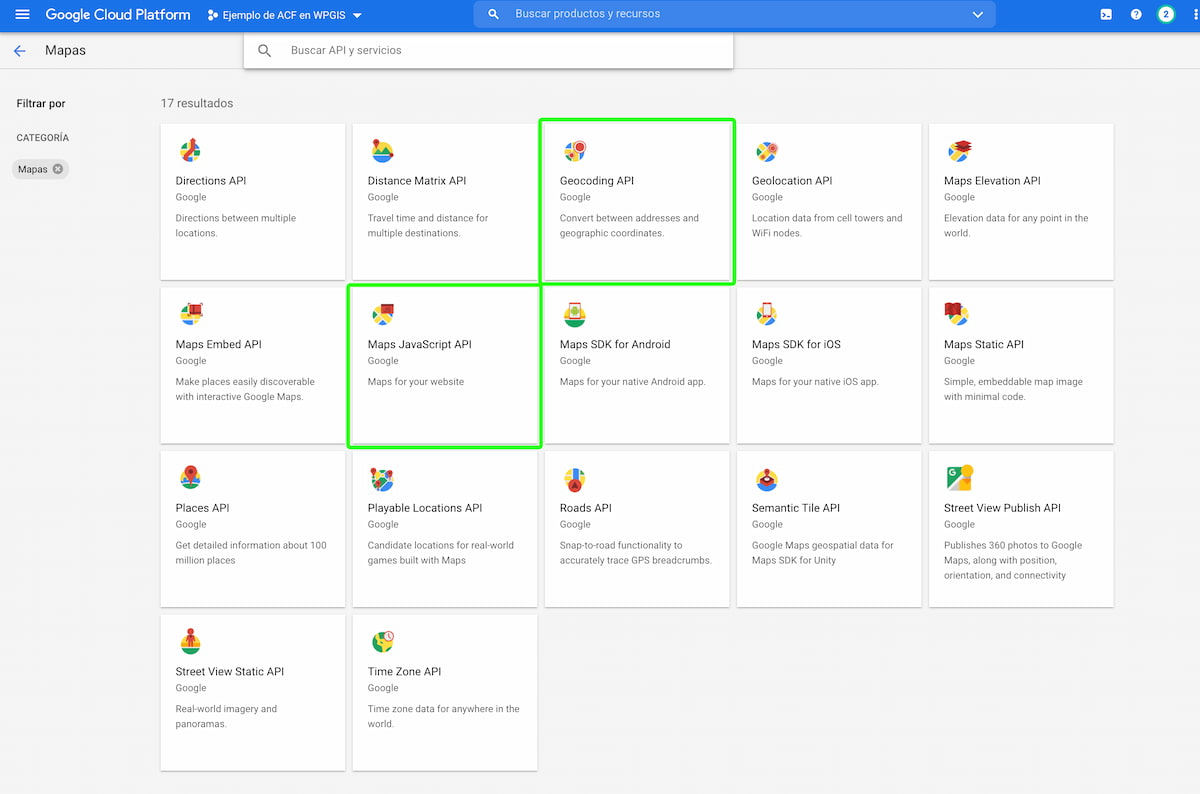
Verás algo así como un enrejado donde te aparecerán filtradas las diferentes API de mapas.
En las categorías del lateral podemos filtrar todas las APIs para mapas haciendo clic en Mapas, donde hay 17 APIs.
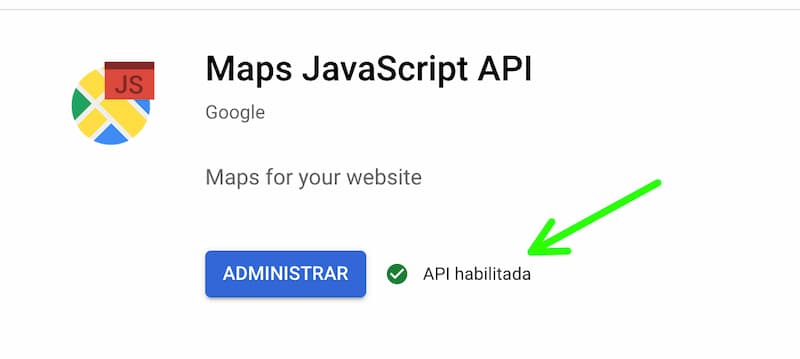
Recuerda que habíamos habilitado todas las API, pero si entras en cada una de ellas, verás la confirmación de que la API está habilitada y podrás administrarlas y desactivar las que no necesites.
A partir de ahora puedes utilizar cualquiera de las API habilitadas en tu web.
Ya puedes incrustar un mapa, introducir la API Key de Google Maps en tu plugin favorito de mapas, etc.